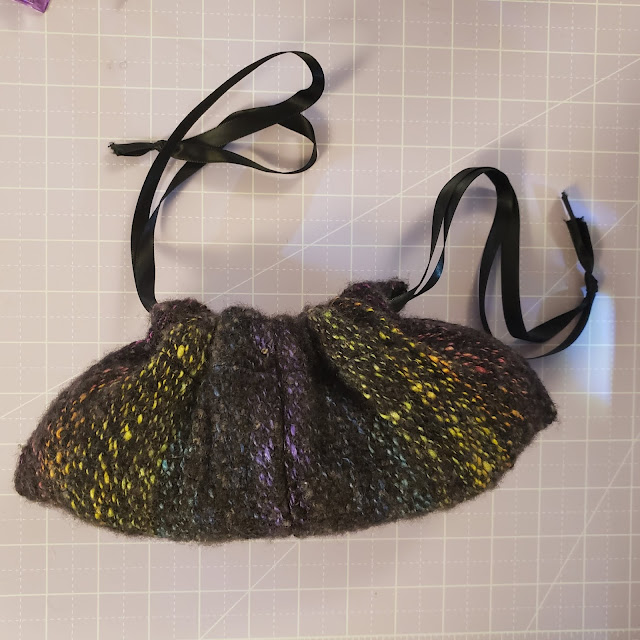
Sewing a handwoven and handspun bag
using yarn that I spun to weave a fabric that I can then sew into the garment.
The problem with this:
I am still a beginner weaver and barely able to sew a straight line in any fabric, let alone handwoven fabric.
And so I decided to start small:
a small little pull string bag, just big enough for one skein of yarn, but small enough to be comfortably be carried by my dear Fiberdog Hestia.
The yarn
Many, many years ago I attended a little wool and fiber festival in Germany. And one of the vendors carried this:
A cute jar full of rainbow colored Tussah silk!
Of course I had to get it and in fact I started spinning it right away (on a newly bought spindle, if I remember correctly).
While I was spinning it, I was wondering already how to ply it.
I definitely wanted to keep the rainbow sequence and I also wanted to get as much yarn from it as possible.
My solution: ply it with a pure black silk single.
The result was absolutely stunning and is still one of my most favorite yarns I ever made:
The fabric
Years passed.
I loved my rainbow silk yarn and I didn't want to "waste" it in just any project. It had to be something special. I had no idea what that special project would be, but I was certain I would find out eventually.
And I was right.
After I moved to the US, I finally got a floor loom and after a first few projects to get to know the loom, I finally knew what to do with the rainbow yarn! It wanted to be woven!
And so I just dressed the loom:
The silk was strong, so I knew it would survive being the warp in this fabric.
For the weft I chose a simple BFL yarn, that I had spun and then dyed black.
I was so in love with it!
There are a ton of weaving mistakes as I still didn't have any idea how to use the loom properly, but I loved the whole process.
The result was this narrow, but super long piece of fabric.
Feeling brave I machine washed and dried it and oh my, what a soft soft fabric.
The bag
The first step in making the actual bag was also the scariest: cutting my handwoven fabric.
Anyone who has ever woven and cut fabric surely can understand my inner screams as I imagined myself standing over the fabric with scissors.
But I had a secret weapon: the zig zag stitch on my sewing machine!
I took the fabric to the machine and sewed two parallel (more or less) zig zag lines right where I wanted to cut (I cut between the two lines). This secured the edges of cut fabric and so I could use those scary scissor blades on my precious fabric without fear of having everything unravel.
I cut two panels like that and then sewed them together in the purple section. It might not look like it in the picture, but I also pressed the seem open.
Of course I didn't measure anything and so one of the panels was longer than the other, but luckily my new rotary cutter was able to fix that.
Next I folded over the top and bottom edge and sewed those down close to the edge of that fold. This would create the tunnels for the draw strings.
With those two tunnels in place I folded both tunnel edges together (right sides facing) and then then sewed along the sides, leaving the tunnel part open.
I chose two simple satin ribbons (that I normally use to fasten my tags to my products) as the draw strings.
The way they are laying in the picture indicates how I threaded them trough: both go in a complete circle, but from opposite sides of the bag.
And that was it!
I just turned the bag right side out and tied the ends of the strings together and done! My very first bag, made from handwoven fabric that is made from handspun yarn!
Very simple and FAR for technically well done, but I am still proud.
It will serve its purpose and it is just so cute!
I hope you enjoyed the making of this little bag as much as I did.
Enjoy your crafts,
Nat


Comments
Post a Comment